
 605 Power Steering conversion for the tri-five Chevy's
- - Back - -
|
Info From Web Archive Article
A picture walk thru of the 605 power steering conversion for a 55-56-57 Chevy.
Below a comparision of the 605 to the original tri-five steering boxes. 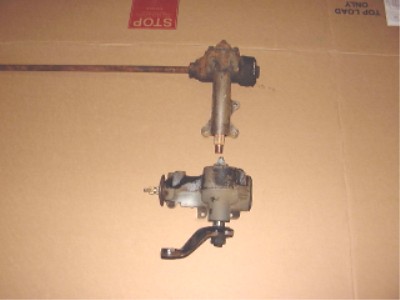 To disassemble the 605 box, remove pitman arm, if attached. Then remove the snap ring in the top of the 605 that holds the round top cap on. Look around the top edge and you will find a small hole near the line fittings. Take a pin punch or an awl and push it into the little hole. This will push the snap ring in so that you can get a screw driver under the snap ring and gently pry it out. Also remove the lock nut from the adjusting screw/bolt. This is left handed threads so be sure to turn it clockwise to remove. Now screw the adjusting bolt down into the box until the top comes off. NOTE: It is a good idea to soak the adjusting screw/bolt with WD40 (or the like) for a day or so before you start. To disassemble the tri-five box, remove the pitman arm, if attached. Then remove the three bolts holding the top on the tri-five steering box. Remove the adjusting screw/bolt lock nut (turn counter clockwise) and screw the adjusting screw/bolt down into the top. When the top is off, look and be sure the sector is in a position so as to allow it to come out from the top of the box. It may be off center and if so, the sector will catch on the inside lip of the box. This can be moved by rotating the worm shaft. Below is pictured the difference in the two sector shafts. You have to cut the outside two teeth off the tri-five sector shaft and remove 1/8" from the top of the tri-five sector. 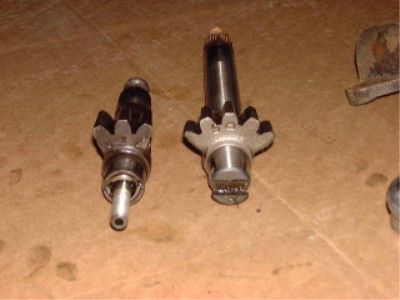 Below is pictured a tri-five sector after cutting the two teeth off. 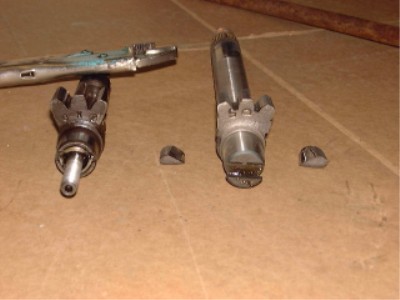 The tri-five sector will need to be shortened 1/8" to clear 605 top cap. 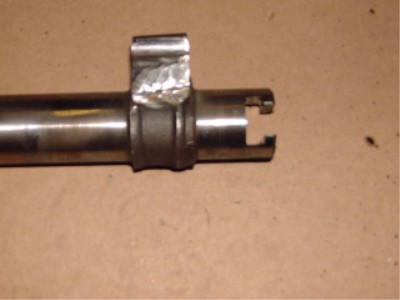 Below the tri-five sector after being shortened 1/8" to clear 605 top cap. 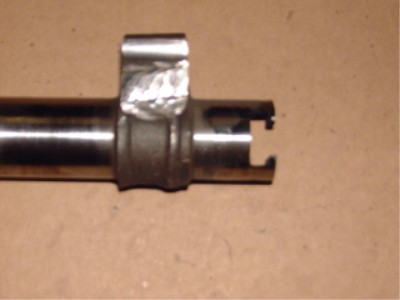 Next remove the adjusting bolt from the 605 sector shaft. There is an inside spanner nut that screws down inside the top of the 605 sector. Remove this and the adjusting bolt. When the bolt comes out, there will be a very thin washer on the bolt. Discard the thin washer. The adjusting bolt is all that's needed from the 605 sector. Place the washer from the original tri-five adjusting bolt on the 605 adjusting bolt and slide it in the slot on the modified tri-five sector shaft (shown above). Then just reassemble the 605 using the tri-five sector. Next, the lower 4 1/2" section from the tri-five box will need to be removed. It is best to use a power hack saw, but it can be done with regular hack saw. You will use the 4 1/2" section as a pillar block on the frame. The photo below shows the 4 1/2" section after the cut. It hasn't been done yet, but you need to drill and then install a grease fitting in the center of the pillar block. 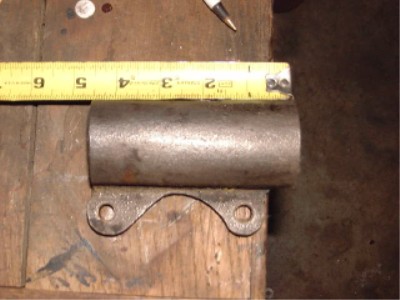 Next remove the bronze bushing from the tri-five steering box. The bushing can be found by turning the upper portion of the tri-five steering box top side down, on a flat surface, and looking in the hole where the sector shaft came through. You will see the bushing (bronze). Find a socket that fits snugly inside the old box section, but not through the bushing. Then tap the bushing out of the old tri-five box and install it in the top of the pillar block. Below is 605 box with tri-five sector and pillar block attached. 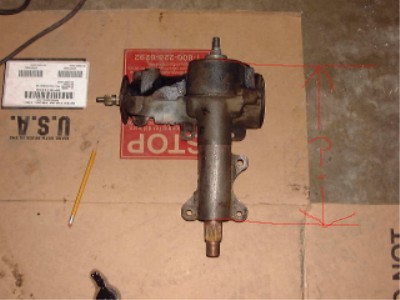 Completed 605 below. Note the bracket. welded to the top of the frame. This stabilizes the 605 on the frame. Also the grease fitting in the pillar block 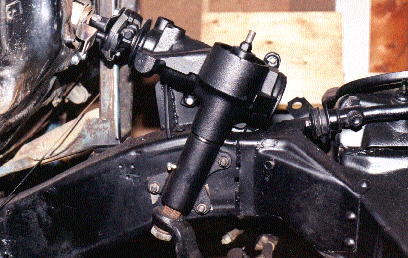 Below is the frame bracket from the outside view. 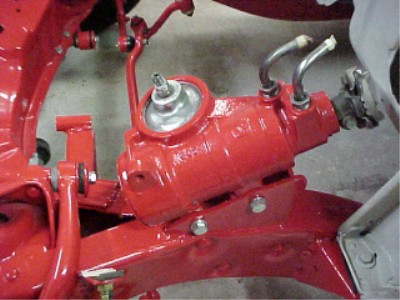 With the modification complete, it's a good time to check the 605 hose connections. The 605's have two different types of line fittings, o-ring or flare fittings. The flare fitting has a "flared seat" for the hose while the o-ring is a bit deeper and a flat seat for the o- ring. Also there are a few 605's with a metric thread. The type of fittings you have is important since it will determine which pump you use, a pump with a flare fitting, or an o-ring fitting, Unless of course you have the lines custom made. The column also needs to be modified. One tip, if you want a tilt column, start looking for a column from a 71 to 78 Chevy or GMC van. The best fit is from a 65 or 66 Impala or Caprice GM Box Interchange - Provided by Jim 'Canuck' Campbell A list of direct bolt-on boxes and some that need modifications.
Interchange #706 Buick Special 64-70 Camaro 67-74 Chevelle 64-70
Fast Ratio Box: 20/1 # 7806396 Cast No. 5679142
On some 64-70 the drag link hole on the pitman arm may need to be enlarged. The following boxes will fit but may need to have the pitman arm and/or the rag joint changed or and extra bolt hole boss taked off the steering box. Make sure you compare the input shaft length or the length from the bolt holes to the end of the input shaft to your power box. Interchange #999 Apollo 73-75 Omega 73-79
Interchange #989 AMC Ambassador 70-2
Interchange #1034 Jeepster 72
List was derived from Hollander Interchange Manual Fast ratio Power Steering- Saginaw 605 Use box from 1977-81 Camaro/Firebird with disc brakes (or any 800 series box used in Novas, full size GM, etc), gives approx 3 turns lock to lock, versus original power steering 4.5 turns. All later model boxes require the 1964 - 72 Chevelle pitman PS arm (required change) when used on earlier Chevelles. Steering shaft comes in two diameters, get the appropriate flex coupling lower half in the same style as original to match the boxes shaft. 1982 or 86 to 92 Comaro Z-28/firebird Trans-AM are 2 turns (12:1) lock to lock, Use original end cap to get the right stops on 2 turn boxes to decrease turning radius. Later model boxes (1980 and up) use "O" rings instead of flared input and output lines. Later model internals can be swapped into early boxes to eliminate problems with line fittings and stops or pump can be modified by changing outlet valve (this requires verification) or swapped to accept "O" ring hosed. |

 Home
- Links
- Events
- Store
- Vendors
- Forum
- Specs
- Pics
Home
- Links
- Events
- Store
- Vendors
- Forum
- Specs
- PicsG. McDowell

est. 1996